Modelling Indian Railways in Bricks - III
Contents- This page Diesel & Electric Locomotives
- Page 1: Overview and Basic Geometry
- This page Passenger & Freight Stock
Locomotives - Diesels
Now enough about coaches, lets get on to making something with diesel power!!! Most of our diesels originate in design from the original Alco WDM-2 models. Since this basic shape is virtually the same in all the contemporary models, (like the WDM-3D, WDP-1, WDG-3A/WDP-2 etc,) building one of these is fairly easy. Here are some inspirational sources to get you started off:
- Alco WDM-2 (Steven House)
- Alco c420 #2010 (non-IR, but close enough to our own diesels due to the Alco parentage). James Mathis (brickshelf.com)
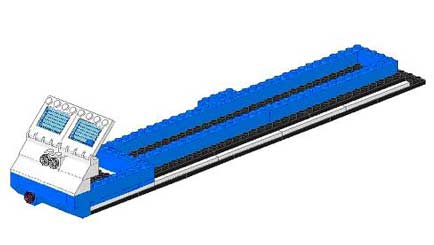
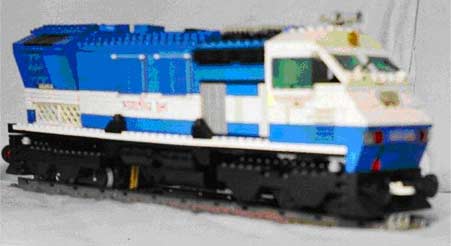
I'm more concerned about the more unusual designs like the WDP-4 and the WDS-4. I have come up with designs for both of these, and I encourage you to come up on ones of your own too. The point of this document is to get your mind creative. Here's one of the first CAD trials of my WDP-4, and a picture of the finished model (sorry about the image quality):
By making some changes to this design, including mirroring the front for a dual cab setup and changing the colours, we can also build a WDP-3A, or a WAP-1 or a WAP-4. Cool, huh?
The main issue which I found to be a challenge to replicate was the drive rods of our WDS-4 switcher. Now, none of the newer sets released by LEGO® have steam driver wheels (although you may still be able to get them from here: http://www.bricklink.com. One person has come up with a solution, namely, to make the wheels himself: http://www.bigbenbricks.com. But these are not official LEGO® parts, and although their reliability and quality may not be in question, we'd rather stick to parts that we are more likely to come across. Hence I employed this design, which uses official LEGO® parts:
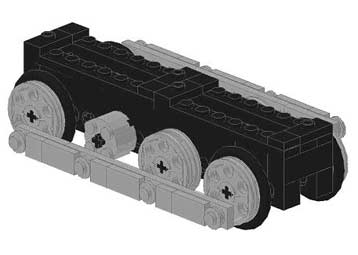
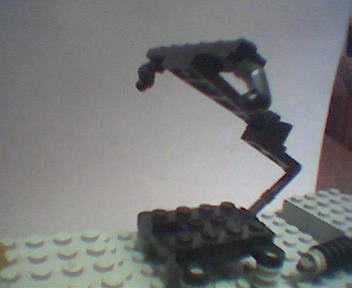
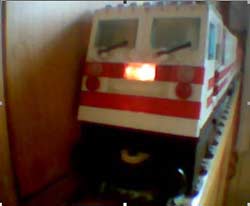
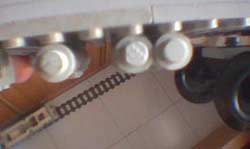
This was first spotted by me on a steamer by Ross Neal (brickshelf.com). I then modified it and came up with an original design in order to suit the WDS-4's needs. One major disadvantage of this design is its inability to negotiate LEGO® switch points, but that was a sacrifice I was willing to make. Of course, anyone trying to build their own switcher may wish that it would be able to negotiate points. Of course this is possible, but as far as I know, only at the sacrifice of the driving rods and this type of wheel set (you would have to use regular LEGO® train wheels). This same design can be used by us to model the WCG-1's wheels, the EA/1 WCP-1's wheels, and even the wheels of various other steam locomotives. Here are pictures of my finished Central Railways livery WDS-4. (Note the engineer. He seems really proud of his beast. :) )
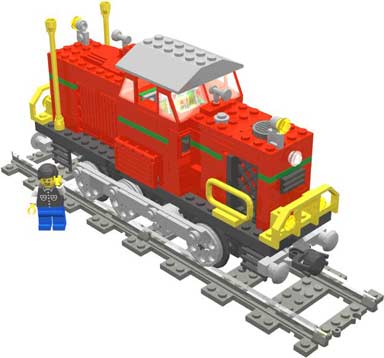
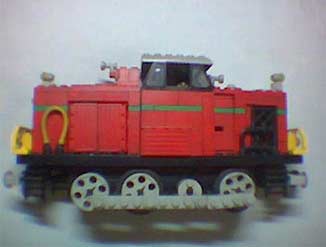
You may have noticed those funny yellow rods pointing up in the upper picture. Those are actually flexible tubes, and can be joined back down to form a railing. These are curved down as they should be in the actual model shown in the lower picture.
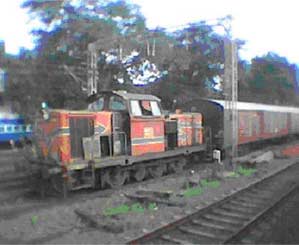
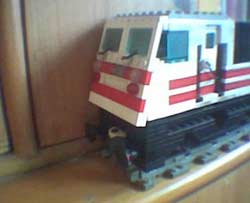
The picture below shows the double arrows livery commonly found on WR lines (this picture was taken by me at Mumbai Central, hence the colour mismatch to my model, which is in CR colours). Complete building instructions for this model can be found here (brickshelf.com).
Locomotives - Electrics
Most of our electrics share a resemblance to the original SNCF designs, which I will demonstrate here. Older electrics, which do not resemble any current shape, such as the EA/1 WCP-1 and our dear 'Crocodile' WCG-1's main problem of wheels has already been discussed above. But here are some additional links to LEGO® versions of the Crocodile (Since it is originally a Swiss design, there are a fair number of models out there that can be used as a source of inspiration for our own. Apart from this, the LEGO® Company itself had released a set of one in 1991 which became extremely popular. Hence, even more enthusiasts are aware of this design. The instructions for it are the first link below, as well as links to other designs. I have included Brickshelf user names as well:
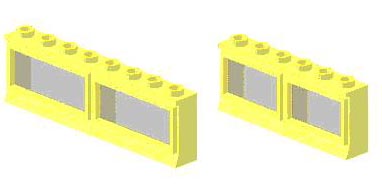
And here's a solution to the EA/1 WCP-1's other problem: the front cab windows. The design shown below uses LEGO® train doors to achieve the front 'V' profile. An added bonus is that the wedge plate (often used in regular sets as airplane tailfins) shown alongside has a matching geometry, which means that the roof and the floor can form a snug 'gapless' fit with the doors:
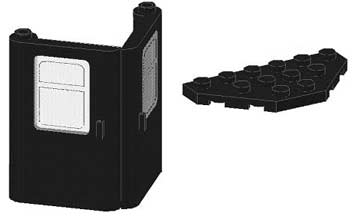

The drawbacks of this are that the windows seem a bit too long, and since the doors themselves are 4 studs long each, they cannot be used on 8-wide versions. However, so far, this seems to be the best method.
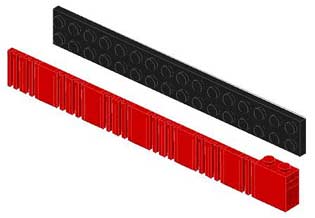
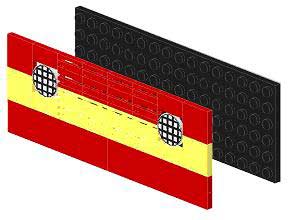
The main bodies of modern electrics are fairly easy to replicate, so I will, again, only be discussing IR-specific details. Most of our modern electrics (like the WAP-4 here) have grilles on their sides like the ones shown below:

Now LEGO® has made several options available to us when it comes to making grilles (there are more, but these are the relevant ones).
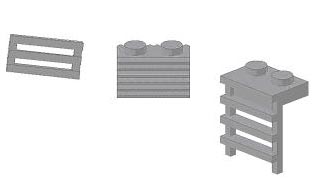
The first two from the right are easy to 'use' in a model since they can be attached directly in the regular studs facing 'up' position. The other one is a bit trickier (but also the nicest looking) one to use in the position shown in the above picture. Let me demonstrate:
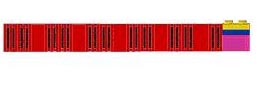
Here you see the 5 : 2 ratio is visible again! The grilles are held by a 2 x 16 plate at the back:
This idea can be further expanded to hold all eleven grilles on the side of the WAP-4 shown. These can in turn be joined to the main body of the locomotive by using various brackets and bricks concealed in the locomotive's main body, like these:
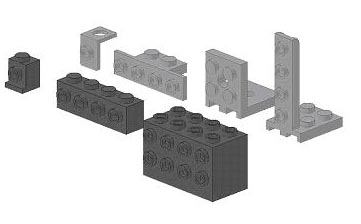
Here's an example from my WAP-5. The bracket I used in this case is the same one as the second from left, in the back row of the picture above (note that 5 : 2 ratio again in the picture at left below :) )


Another feature commonly found on older electrics are 'portholes':

Using a method similar to the one shown above, we can make these too:

Yet another feature found on top of electrics is all the complicated electrical stuff (pantographs, wires, etc):


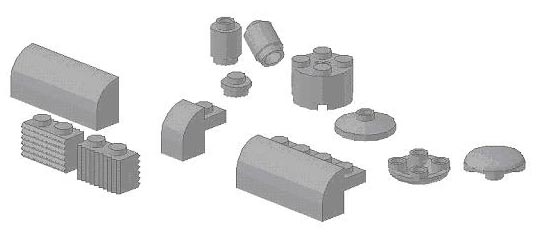
This can be replicated easily using the following parts (Again, there are many other parts, but these are the ones I generally use. You are only limited by your ingenuity.):
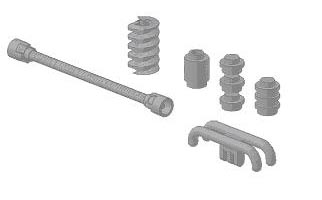
Front row: a pipe (the same pipe that was used for the WDS-4's railing earlier), and a regular LEGO® pantograph shoe. Back row: 'Technic' worm screw, 1 x 1 round brick, Three 1 x 1 round plates stacked on one another.
Shown below are the pantograph and the roof detailing on my WAP-5. For the pantograph I've used minifigure arms and regular hinges. Pantos are quite hard to replicate due to tehir small size, but can't be left out, since they are the very definition of an electric. The roof detailing has the pipe piece used as a WDS-4 railing earlier, some silver flex tubing from mech sets, the usual 1 x 1 round bricks, and lastly, a 'Technic' worm screw.

Yet another feature, which is fairly unique to IR electrics, are the cab windows:

This can be replicated as follows (two solutions, one for 8 stud wide trains, and one for 6 stud wide trains):
However, I must admit, LEGO® has stopped manufacturing these windows. This is very unfortunate, but you may still be able to get them through eBay or, more likely through: BrickLink. Or, even better, you can try to come up with your own solution.
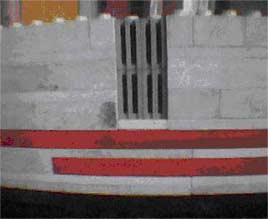
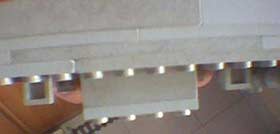
Here's another example of one of my models (a WAP-5) which uses a design similar to that of the WDP-4 shown in the previous page. A bunch of plates are attached onto slopes using angled hinges. (Note that the light is on in some pictures):
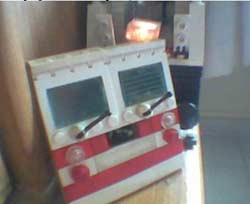
Note the door in the top right picture which is offset by � a stud using the half stud offset geometry demonstrated earlier. (I have not yet added decals to this particular model, hence the gap in the striping where the slope is.)
And a 'real world' picture for comparison:

Undersides
Any kind of equipment located underneath your locomotive would be the underside. For example, in the case of diesels, it's the fuel tank, in the case of coaches, it would be the air-conditioning equipment, waste discharge (from toilets) etc. In this section I'm going to demonstrate to you how to build such details and also discuss the various bogies and how we can replicate them, especially for 8-wide trains.
Detailing on the underside often requires a bit of ingenuity to make it look right, but like everything else, is very rewarding when it does end up looking like the real thing. Here are the basic elements which we can use:
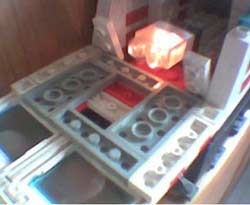
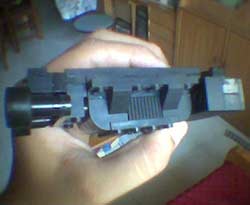
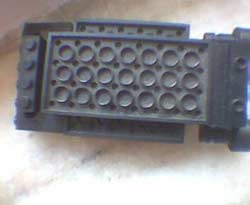
Here are pictures of my WAP-5 underside details. The centre picture shows the ingenious use of race car tyres to replicate some detailing, and the last shows the way in which it is attached to the main loco body:

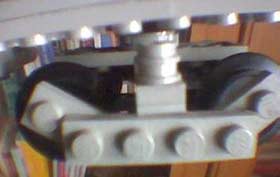
Here's the bogie:
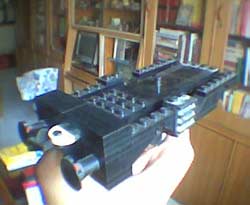
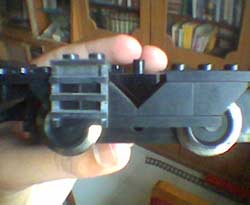
Most of the frame surrounding the wheels consists of a zigzag pattern. This is faithfully replicated here, along with the cab access ladder. Other things found here would include an assortment of pipes, springs etc. most of these have a negligible size, and are quite hard to replicate to scale. I generally leave them out, but then that's me. Besides this, the frame which holds the wheels and the 'decorative sides' on the motor both have spring designs moulded on to them like this:
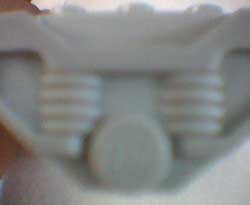
If these can be made visible (and they are visible in any case on 6-wides, since the designs above are for 8-wides and do not look nice on 6-wides) they create a reasonably good effect. For larger springs, that can be replicated, use 1 x 1 round bricks, as I did for the LHB's bogies:

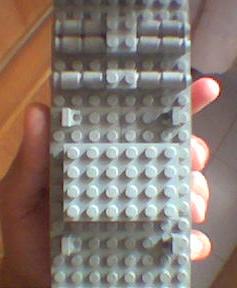
And here's some underside detailing on the LHB rake (it is built in a unique upside-down-right-side up method; hence the studs are visible even on the bottom):
A note about bogies: This is where the Bo-Bo motor starts causing trouble. Due to its large size, quite a lot of space under your loco is taken up by the integrated third wheel design discussed earlier. You are also obliged to make the second bogie (which is usually left unmotorized) longer anyway, in order to match with the bogie in front. Generally it is whatever is in between the two bogies that pays the price due to this. If you looked at the solution I had come up with, it only goes to solve half the problem, since it only reduces the length of your locomotive by placing the motor in your fuel tank/underside. Some inaccuracies, however small, will still remain here if you approach the problem with this method. As of now, no fully satisfactory solution exists to this problem. You may find one useful in one situation, and the other useful in another. Longer locomotives, such as the WDP-4, fare quite well with the integrated third wheel and specifically in the WDP-4's case, enhances the authenticity of the model, replicating the 1+Bo-Bo+1 wheel sets present on the real diesel. Shorter locomotives, (or any locos where the wheels are spaced closely together), like say a WDP-2/WDP-3A, would fare better with the hidden motor solution.
The third and most convenient solution is to place the motor in the stock your train will pull, but I personally like to be able to run light locomotives too, and the sight of a rake minus the loco running around the track if the controller is on does not quite please me! This solution works best for steam locomotives, where the motor can be hidden in the tender, since tenders are almost always seen with their locos.
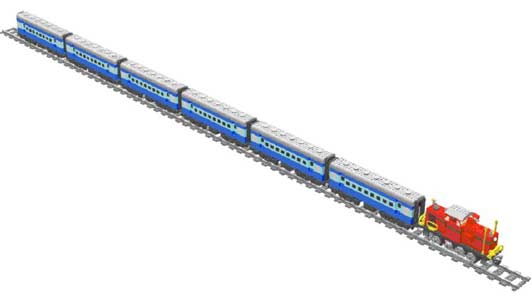
Well, I'm glad you stuck around till the end! Feel free to mail me at my address, with your questions, comments, compliments, criticisms etc: Samarththegreat@hotmail.com.NOSPAM and have fun building! I leave you with a picture of the models I gave building instructions for. One of those powerful little WDS-4s shunts a heavy passenger rake :) :
A list of general unofficial LEGO® Related links:
- LUGNetTM: The biggest unofficial LEGO® fan site and discussion group, which is a lot like our own mailing list, but much bigger.
- BrickShelf: The biggest database of CADs, instructions, images, videos, all of them of LEGO®! It also has a database of building instructions of official LEGO® sets, and catalogues, right from the 1970's!
- MOCPages: Free web hosting for your LEGO® creations.
- BrickLink: Unofficial LEGO® marketplace, which is absolutely HUGE! (You'll need to go here if you want to buy parts for the models above.)
- LDraw.org: This website provides free downloads for the CAD programs I used for some images on this page.
- Bricks on the Brain: This website is a portal for thousands of LEGO® building instructions, including my own.